Sunday, July 26, 2009

Flower Pot Note card

This cute little flower pot comes from the ladies at Pair-A-Dox...thanks for sharing. I think it is adorable. Instructions and dimensions are included because this just had to be shared.

About the flowers....they were created using Spellbinders Shapeabilites Daisy Heads, just used the smallest flower. I love the detail "veins" in the flowers.

About the leaves....easy peasy and too cool. They are hand created, notice the veins and the alternate ripples? To make, just take a 2 X 11 piece of green cardstock and fold long long ways, crimp, cut out leaves, unfold. Awesome end result, minimal work.

About the paper....this is SU's retired Parisian Summer paper. If you have some, you are a head of the game, it is very hard to find. The solid cardstock is Stampin Up. I have found the SU TeaParty paper looks good with this card.

About the ribbon, brown and pink and coordinates perfectly with the paper, costs $3.99 a spool at Michaels.


You can click on the photo and save a copy to print/obtain the instructions.
Blessings,
Teresa

Tuesday, June 9, 2009

Love is in the Air

I made this anniversary card for a friend to give to his wife for their first anniversary. I like the shimmer and softness of the card.

The CS is a gold and chocolate shimmery Bazzil paper. The bird image is from "Our Daily Bread" designs and is called "Sing Unto the Lord". The "Love You" image is from StampinUp. The DP is from last year and I don't recall the company name. Ribbon is a brown sheer ribbon from a local craft store, the brad is a beautiful pink and bronze butterfly.

The inside sentiment says "To love and be loved is to feel the sun from both sides". Not to mushy but very sweet.


Blessings,

Teresa

Saturday, June 6, 2009

Tea Bag or Candy Holder

I have been busy playing with this teabag holder template I found on Splitcoast. Fun Fun!

While it is a great tea bag holder, I find I prefer to fill them with Ghirardelli chocolates. I just know you are saying "Well of course". I used a variety of papers, this is a great way to use your scrap papers, of which I have an abundance. This is the case with all of the items shown here except for the layered large flower, it is SU's Tea Party designer paper and I just had to use it on at least on of the holders.

Enjoy,

Teresa


Friday, June 5, 2009

Birthday Card with Coordinating Box and Gift Card Holder

Happy Birthday Jennifer!!!!

She won't see this post however, this is her birthday assemble, it is a card, matching box (Dawn on YouTube again), and gift card holder.

The card stock is SU's Lovely Lilac, the designer paper is from Creative Imaginations and is double sided. No name on the paper, unless it is "Renae's House". There was a lot of paper cutting involved in this project. The flowers are embellished with glitter pens and gems for the bling I love so dearly.
Until later...

Teresa


Thursday, June 4, 2009

Masculine Birthday Card and Coordinating Gift Card Holder


Hello again! It has been a while and I'm sorry about that, however, the yard has been a life sucking force for the last several weeks. You know, raking, digging, pulling, planting, hoeing, once done, the cycle starts again. Our yard is beautiful, but man it is a lot of work. Also, we have had several happenings in the family, husband returning from overseas and several birthdays.
So, I have been creating, just not posting much.
The photo I'm sharing now was inspired by a card that was created by pair-a-dox creations. Kudos ladies, this is a great man card. The smaller card is actually a coordinating gift card holder. I found the template for the gift card holder from Dawn on YouTube. The colors for both projects are SU's River Rock and Baja Breeze. The stamp set us SU's Nature Silhouettes. On the card I used a Cuttlebug embossing folder for the background.
For the gift card holder..to create do the following:
cut card stock 4 1/4 X 11
Score at 3, 5 1/2, and 8
Fold score lines accordion style
Tape the two center folds together using tacky tape
Use the SU Word Window punch to create a straight line within the center fold.
Use a 1/2 inch circle punch to create an indentation that allows easy grasp of the gift card.
Decorate.
You can add a belly band if preferred over the ribbon, cut it at 1 X 7 1/2.
Blessings!
Teresa

Thursday, April 30, 2009

Flower Fairies


I found this stamp at Michael's on clearance and thought I could make a pretty card for my grand daughter. I colored the image with colored pencils but think it would have come out much better with water colors. With that said, it took a long time to color, so when I have a chance I'll take another crack at it.
This image provides a great opportunity to practice blending, which I think looks pretty good.
The stamp comes from Stamps Happen, Inc. and is made in the good old USA!!!! It is called "Flower Fairies".
Blessings!
Teresa

Wednesday, April 29, 2009

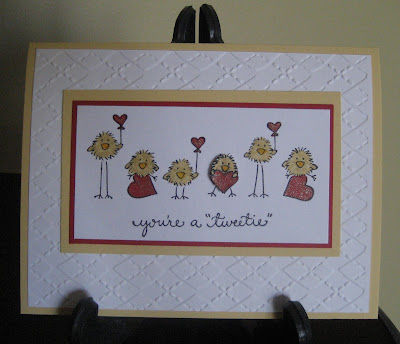
Chicks...lots of em!


Recently my friend Linda and I went antique shopping. While at a new antique mall I stumbled upon a booth with paper crafting items, it was glorious. I purchased several cards (want to support the craft and add to my ideas). Also, I found a card rack that was in excellent condition and only cost $25.00. I was sooo excited.
I thought these little chicks were cute and showed this card to my card pal, she knew exactly where they can be purchased. So, of course I did.
If you would like to know.....
They came from the Denami Online Store. I forgot to pick up a business card while at the shop, so I don't know the name of the card creator, but I do know the back of the card is stamped with "Sweet Cheeks".
Thanks for looking!
Teresa

Tuesday, April 28, 2009

Saturday Evening Post - Bird Watching

This is a Father's Day card I just created.
I know Mother's Day hasn't arrived yet but I thought I better get the jump on Father's Day because my masculine stamp line is limited and I find man cards to be a bit of a challenge.

This cards doesn't exactly please me...for one thing, it looks like it would be better suited for fall. Another issue, it really needs a little pop, or bling, or something. Don't get me wrong, it is OK but this stamp is so cool, I would think I could create a better card. So if anyone is reading this and has suggestions on how I can use this stamp and create a GREAT Father's Day card...I am listening. In the meantime, I'm going back to the drawing board to see if I can improve this one.

The stamp was purchased from Cornish Heritage Farms and is called "Bird Watching". It was stamped with SU's chocolate chip and heat embossed with clear embossing powder. The paper came from a scrap heap I had on my desk. The ribbon is a sheer brown that I dearly love and I used SUs Aged Copper embellishments.

Just thinking ahead...now I better get working on a Mother's Day card.

Blessings!

Teresa

Monday, April 27, 2009

Sunflowers and Roses


For those of us that like to create cards...I think some of the attraction to card making is that card making doesn't require a long term commitment. We can whip up a card in an hour or so, fulfill our need to create and move on. I have recently learned the same can be achieved with one stroke painting.

As mentioned in earlier posts, I've been attending art classes at a small shop in my neighborhood. This is the product of the class. Nothing fancy and only took a few hours. That is to learn and to paint. Once you know how to do this, it can be done in thirty minutes or less. Gotta love that. To date I have painted a sunflower and a rose. I will be painting a hydrangea and iris next. Once I have learned several flowers, I am going to paint a flower garden. I am sooo excited!

Hope your day is filled with sunflowers and roses!

Be blessed!

Teresa


Saturday, April 25, 2009

Great is Thy Faithfulness

I recently purchased a few stamp sets from Our Daily Bread Designs. I just love that store. Kelly has created some wonderful stamp sets. One of her newest offerings is the Scripture Collection 1 and 2. This card is made using Scripture Collection 1. The paper is Basic Grey's Bittersweet. I used the Martha Stewart "twig" punch.

This verse makes me excited, just to know of God's faithfulness and that His mercys are new everyday. He knows we are flawed and subject to fall short of His glory, yet He provides new mercies everyday.

I cased this card design from SplitCoast, went back to find the name of the poster, went five pages in with 96 post on each page, didn't find it. If I find it, I'll edit this post to ensure proper credit is given. Also, the "Our Daily Bread Designs" gallery is awesome, every card is beautiful.

Now it is time for me to head outside. So glad I can, the weather has been wet and cold for weeks and I have been sick. Today, sunshine and blue skies and I am feeling a little better.

Have a day filled with sunshine and blue skies.

Teresa

Tuesday, March 31, 2009

Creating paper from a napkin - more wisdom from Rebbecca

This card was created at a card club gathering, our hostess Rebbecca shared this technique with us.

Who would have thought of creating beautiful paper using a napkin? Well that is one of the projects Rebbecca shared with us. It is truly lovely. We used Pearl-X paints that really adds pop and bling.

How was it done you ask... The napkin was unfolded with bumpy side up, painted with flexible black acrylic paint. While drying, I mixed four different shades of Pearl-X powdered metallic paints (just a measured smidgen) with a bonding medium. In one of the vials, I added glitter. Once the painted napkin dried, I took a baby wipe cut it into four pieces, then dabbed the colors onto the napkin. Allowed that to dry, then turned the painted image down on a table then added a peel and stick paper adhesive to the back side of the painted napkin. Cut out the newly made paper and added it as accent paper to this lovely card.

Did not paint the stamped image as it would take the focus off the paper.

It was a little work and took a while, but the effect is dramatic. I like it.

Thanks Rebbecca!

Teresa

Monday, March 30, 2009

Technique - Making paper black shiny cardstock and Pearl X

I recently attended a card club as a guest. The person hosting was the most graceful Rebbecca. The evening was a coffee/tea theme and each attendant brought a card for each person there. Wow, I loved that part, I acquired a stack of nine awesome cards. But the best part of the evening was meeting these lovely people and having fellowship. You know when you meet people that love paper crafting, you can ease into smooth free flowing conversations in a second...and we did.

Back to Rebbecca, it was her turn to host the evening, meaning she brought a few projects for us to do. We used Pearl-X paints to create a metallic background. It really was easy, we mixed the paint with Jacquard Finest Grade of Pure High Gloss Clear Copolymer - a brand of varnish. Stirred the mixture then poured the paint on shiny black cardstock, rubbed another piece of the cardstock with the first piece..had to move quickly or the two papers would bond, then came up with this.

I could envision this being used on a Christmas card with the one star or as a backdrop for the wise men. Just thinking out loud.

Blessings,

Teresa

Sunday, March 29, 2009

Sunflowers

I attended another art class, this time to learn one-stroke painting. It is fun and easy and with some practice could really lead to creating some very pretty art. I am thinking flower pots and ceramics mostly. This really wasn't difficult to do considering the class took two hours and I had never painted one-stroke before. Again, I feel if you can tell it is supposed to be a flower, I am ahead of the game. I expect to expand on the painting possibilites and am excited to see where I go with it.

Blessings!

Teresa

Friday, March 27, 2009

Ever Buy Inspiration?

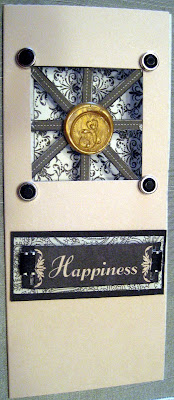
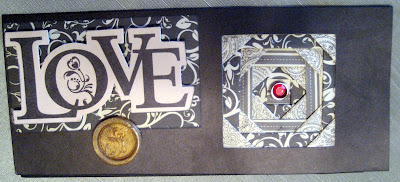
I have. Cardmaker has a card kit club that I recently joined. The first kit is sold at a substantial discount, so not much to lose if you don't like the kit and you can quit at any time. I thought I would give it a go. This is what I received in the first kit....

I like it. The kit has enough materials for ten cards. I only made three (one I sent to my dear husband). There are a few items in these cards that stood out for me, one is on the love card, note the window...that is approximately 30 small pieces of folded paper. I've never quilted paper before, the photo doesn't show this well, but the effect is very nice. As for both cards, I loved the use of hot wax and stamps. You melt the wax then press your stamp into the wax for a very nice touch. I also liked the use of windows. I received a box of window cards and was at a complete loss of how to use them, now I have some ideas.
I also learned, you should handle black cardstock minimally as it does show fingerprints and smudges in certain light. I liked the use of black, tan, and white papers with large red brads, really looks elegant.
Synopsis....worth it. Especially for the use of new techniques. I just received my new kit, it is all birthday cards, some of the highlighted techniques are the use of pop ups and an explosion insert (whatever that is). Wish me luck!
Blessings and happy paper crafting!
Teresa

Thursday, March 26, 2009

Little girls love Tinkerbell


My grand daughter just love fairies, especially Tinkerbell. Her birthday just passed and it was a fairy themed celebration. Of course I had to find Tinkerbell paper and embellishments to make her special card. Actually, I made a few. Here they are...

Happy birthday Victoria, I hope it was wonderful. Love Grandma.


Wednesday, March 25, 2009

Time for Tea

I will be attending a coffee/tea card workshop and swap. I was tasked with making ten cards to go with the theme, thank goodness my friend Michelle came by to help get me moving. I just couldn't make up my mind what to do. This is ultimately what I ended up with...lots of bling.
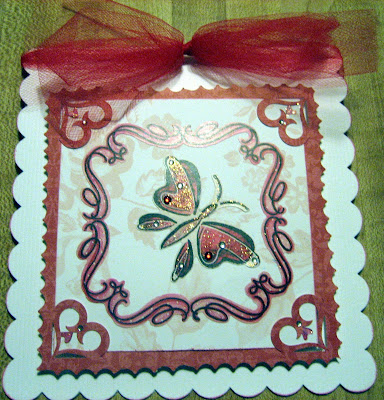
I used SU's scalloped punch and Top Note die cut. The scalloped oval is from Nestabilities. The paper is Cloud9Design Palace Walls - Green sparkle cardstock purchased from JoAnn's. The pink is SU's Pink Pirouette. The blue is generic basic blue from Joann's. I bought the butterfly brad and jewels from Archiver's and cannot recall who made them. The image was painted using glitter pens. Ribbon is generic and came from Cord Camera.

Blessings,
Teresa

Tuesday, March 24, 2009

Listen Honey

I love Emerson Quillen's stamps, they can be found at American Arts Stamps. He is an Indiana artist and produces whimsical stamps that are loaded with encouragement. This card was created using Cloud 9 Design "Pixie Dust - Green 2-sided and SU's River Rock cardstock. The blue strip is from my scrap drawer, the ribbons, flowers, and brads all came from Jo Ann fabric.

I just love the shoes. I stamped the shoes on River Rock paper, punched out with a circle punch, then layered on the designer paper, last layer was punched with SU's scalloped punch. I then used the layered scallop as a "sealer" for the envelope.

Hope you like the card.
Teresa

Monday, March 23, 2009

Painting class

It has been a while since my last post, really have been very busy then under the weather. Still not feeling very well, residual weakness after being sick. Hope it doesn't take very long to rebound, I really need to be able to push through.

Several posts ago I mentioned attending a class at a quaint little shop called "That Cute Little Shop". It is located on Kentucky Avenue, owned and operated by Terry. Terry is very talented and a patient instructor.

This is the first thing I've ever painted, so be kind....ta da! This is a canvas with an acrylic painted cardinal. I think I'm ahead of the game because you can actually tell it is a cardinal. The background was very difficult. I'm told it would have been easier to blend if we had used oil based paint, still worth the experience.

Cards coming soon.

Tuesday, February 24, 2009

Hippity Hoppity Easter is on it's way...

I am proclaiming it...the weather is going to get warmer and spring will arrive on the wings of the red-winged blackbird. I know everyone says it is a sign of spring when you see the robin...but I think it is the red-winged blackbird that lets you know when spring has truly arrived.

Today I was "playing" with an origami box using paper from my stash. I came up with this....

The photo quality isn't very good, not sure why. The box is smaller than I was aiming for, however, I can change the dimensions of the paper and easily change the size of the box. The bottom portion of the box is made from a very high grade Bazil paper, it is actually too brittle for this purpose. I do love the paper though, it is a very soft 'banana' color. The top of the box is designer paper that I picked up last year, it is Far East's "Pocket Full of Turquoise". The photo doesn't display the bling on the floral paper, but it is there. The yellow ribbon is a Michael's dollar bin variety. The tag is from Making Memory's Garden Party. The candy...yummy Dove chocolates.

Hope to be posting more frequently as my schedule isn't quite as hectic.

Blessings all and Happy Early Spring!!!

Teresa

Thursday, January 22, 2009

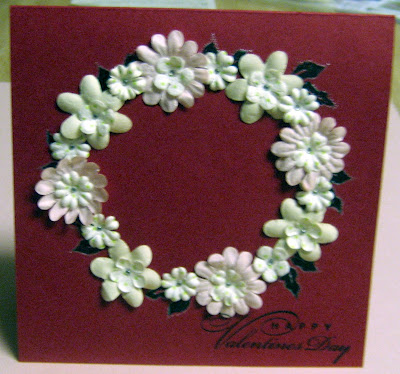
Lot's of Valentine's

Oddly enough, the new SU catalog is out and I don't have one yet. Not to say one isn't on the way, I assure you it is, I'm waiting......

I will admit with some hesitation, I own a few stamp sets, SU and others, that haven't been touched. So I can wait for the catalog, in the meantime, I've been looking at it via a pdf file. I see a few nice additions and have already acquired most of the "I just can't live without" sets.

Papers used here and in earlier post is....
The floral paper (one of my absolute favorites and made in the USA) Anna Griffin. It doesn't have a name but has one of the most beautiful floral designs ever. You gotta look it up, really.
The stripe is from Wild Asparagus, and is called "Sisters", it is two sided, dark beautiful red on one side, coordinating stripe on the other. The dark red with a small starburst design is from The Paper Company and is called "Starburst Translucent". I've also used an EK Success heart shaped corner punch, a Marvy oval, and SU's scalloped punch. I also used shiny red card stock from Archiver's. The heart shape brad is generic and purchased last year. The ribbon came from Cord Camera.

The oval has been dry embossed with a Sizzik embossing folder. I also added a few elements from SU's Home Again Simply Scrapping kit.

I do need to start creating a few birthday cards, have a few special ones to make for a few VERY special people before this weekend.

Until later.

Teresa

Love is in the air!

I have been coming home from work and creating a card or so this week. I've used various materials, dotted sheer ribbon from Cord Camera, shiny card stock from Archiver's, DP from stash, etc. Really just miscellaneous materials that I have at home. I would like to note, the first card listed here is inspired by Michelle G. aka "Twisted Chick". This lady is extremely creative, amazing.

Now back to the miscellaneous materials...I have a real issue/problem....storage. I've only been doing this card making thing for a few years and never imagined how much real estate is needed to keep my treasures. My office is CRAMPED! I was able to purchase a paper organizer, which is grand. Cord Camera unfortunately closed several stores and as a result is selling some of the scrap booking inventory. This organizer is at least five foot tall, has approximately twenty drawers, each with the capacity to hold at least twenty five sheets of 12 X 12 paper. The shelf is in great condition...I am thinking I may need another.

Who knows, maybe I will get this under control.

Hope love is in the air at your house, pray blessings in your home, peace in your spirit, and favor in your life.

Teresa

Tuesday, January 13, 2009

Valentines - Bling 2009

I have a little time before calling it a night and decided to upload some Valentines I made this past weekend. My husband is an Air Reservist and one weekend a month he is away. While he was away on his last assignment, I decided to splurge in some "ME" time, clear my mind, and create cards. I did have a small break in my self indulgence and had a great lunch with my oldest son, what a treat. Creating cards, visiting with my son, and eating a nice meal. Life is good!

Of course, come Monday it was back to work, which has become pretty stressful in recent months. We have endured three layoffs and the atmosphere is tense. Additionally, the ones that are still blessed with steady employment must work harder and smarter to absorb the work left by our departed friends and colleagues. Overtime is required...lots of it.

My instincts (and current news reports) tell me this isn't over, not even close. I pray for healing for our great nation and justice for the victims of predatory lending. I pray for favor and blessings from the Lord.

I do have the blessed assurance from God, that no matter what happens, my steps are ordered by the Most High God and I am in the palm of His mighty hands. AHHHH, no place I'd rather be.

I've used many materials for these cards. Penny Black stickers, Basil, SU, and Archiver's cardstock. Lot's of Diamond Stickles. Some SU DP and some from my stack that heaven only knows what it is or where I bought it. Giga oval punches, heart corner punch, heart clear stamps from Archivers, gem stones, Doodle Bug Dazzle paper (oh how I love that bling), and heart shaped gems that are just too cute.
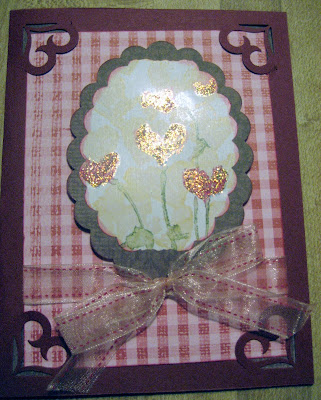
If you have questions regarding a specific card or materials, just comment.

Blessings,

Teresa


Saturday, January 3, 2009

Doing Something New


I am a blog watcher....get lots of inspiration that way. I look at Kitty Carico's and Michelle Zindorf's blogs and really admire their techniques and notice the more they post...the better they get.
I have decided to attend Saturday morning art classes. Nothing fancy, just a lady with a shop down the street that teaches different methods to paint. I am sure this will reflect on my cards. Here are a few of the items that we will be creating in January.
Wish me luck!
Blessings!
Teresa


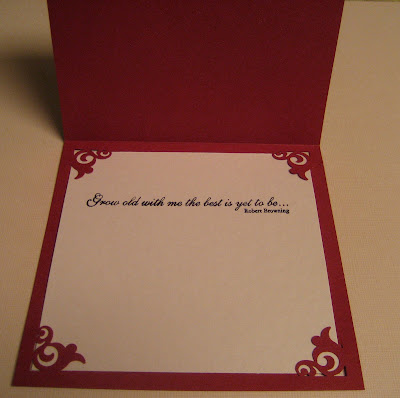
Valentine - Grow Old With Me

I recently attended a Valentine class at Archiver's. The classes are a great inexpensive way to get a creativity boost, and I don't mind telling you I've been in a drought.

So I've been looking at magazines, SplitCoast, The Stamp Shack, and Two Peas for inspiration. I have several ideas. Then I went through my craft room, gathered materials, and started making a new Valentine card...my inspiration for this one...Martha Stewart. Of course I had to add bling and additional detail to this card.


Happy New Year - We are pushing on through.

Wow, 2008 left me with a few brutal blows...as you know my praying, stamping friend Glinda passed away. Her death wasn't expected, a loss that I feel is harder to process. She is with the Lord and I choose to focus on that fact. God speed Glinda.

Emersyn was admitted to Riley Children's hospital Christmas day, she was released January 2, 2009. She had para-influenza. She is doing much better and I thank God for that.

He is Jehovah Jirah....my provider. He provides peace when our hearts ache, healing when are sick, time to care for the family when mother's spend time in the hospital. He is so faithful and I am so appreciative.

Time to move forward and focus on life and living. So here is to a life well lived.

Teresa